

Installing FTP for IIS 7.5
IIS 7.5 for Windows Server 2008 R2
-
- On the taskbar, click Start, point to Administrative Tools, and then click Server Manager.
- In the Server Manager hierarchy pane, expand Roles, and then click Web Server (IIS).
- In the Web Server (IIS) pane, scroll to the Role Services section, and then click Add Role Services.
- On the Select Role Services page of the Add Role Services Wizard, expand FTP Server.
- Select FTP Service. > [!NOTE] > To support ASP.NET Membership or IIS Manager authentication for the FTP service, you will also need to select FTP Extensibility.
- Click Next.
- On the Confirm Installation Selections page, click Install.
- On the Results page, click Close.
IIS 7.5 for Windows 7
- On the taskbar, click Start, and then click Control Panel.
- In Control Panel, click Programs and Features, and then click Turn Windows Features on or off.
- Expand Internet Information Services, then FTP Server.
- Select FTP Service. > [!NOTE] > To support ASP.NET Membership or IIS Manager authentication for the FTP service, you will also need to select FTP Extensibility.
- Click OK.
Creating a New FTP Site Using IIS Manager
The new FTP service makes it easy to create new FTP sites by providing you with a wizard that walks you through all of the required steps to create a new FTP site from scratch.
Step 1: Use the FTP Site Wizard to Create an FTP Site
In this first step you will create a new FTP site that anonymous users can open.
- pane.
- Create a folder at
%SystemDrive%\inetpub\ftproot - Set the permissions to allow anonymous access:
- Open a command prompt.
- Type the following command:
consoleCopy
ICACLS "%SystemDrive%\inetpub\ftproot" /Grant IUSR:R /T - Close the command prompt.

- Create a folder at
- When the Add FTP Site wizard appears:
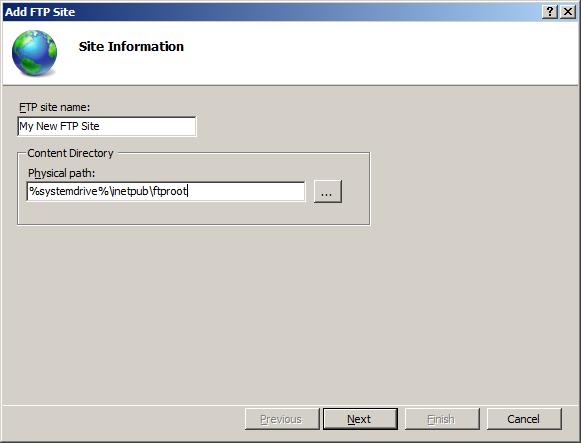
- Enter “My New FTP Site” in the FTP site name box, then navigate to the
%SystemDrive%\inetpub\ftprootfolder that you created in the Prerequisites section. Note that if you choose to type in the path to your content folder, you can use environment variables in your paths. - When you have completed these items, click Next.

- Enter “My New FTP Site” in the FTP site name box, then navigate to the
- On the next page of the wizard:
- Choose an IP address for your FTP site from the IP Address drop-down, or choose to accept the default selection of “All Unassigned.” Because you will be using the administrator account later in this walk-through, you must ensure that you restrict access to the server and enter the local loopback IP address for your computer by typing “127.0.0.1” in the IP Address box. > [!NOTE] > If you are using IPv6, you should also add the IPv6 localhost binding of “::1”.
- Enter the TCP/IP port for the FTP site in the Port box. For this walk-through, choose to accept the default port of 21.
- For this walk- through, do not use a host name, so make sure that the Virtual Host box is blank.
- Make sure that the Certificates drop-down is set to “Not Selected” and that the Allow SSL option is selected.
- When you have completed these items, click Next.

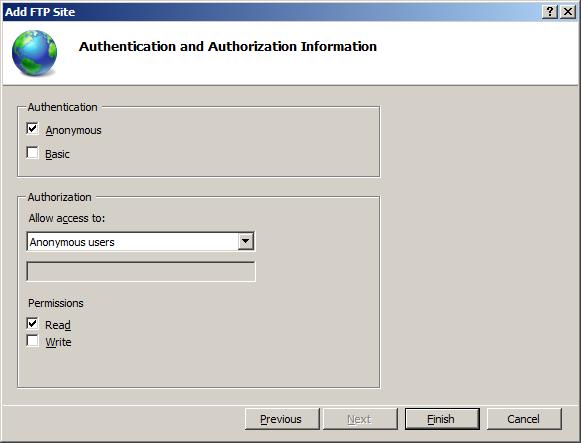
- On the next page of the wizard:
- Select Anonymous for the Authentication settings.
- For the Authorizationsettings, choose “Anonymous users” from the Allow access to drop-down, and select Read for the Permissions option.
- When you have completed these items, click Finish.


Summary
You have successfully created a new FTP site using the new FTP service. To recap the items that you completed in this step:
- You created a new FTP site named “My New FTP Site”, with the site’s content root at
%SystemDrive%\inetpub\ftproot. - You bound the FTP site to the local loopback address for your computer on port 21, and you chose not to use Secure Sockets Layer (SSL) for the FTP site.
- You created a default rule for the FTP site to allow anonymous users “Read” access to the files.
Step 2: Adding Additional FTP Security Settings
Creating a new FTP site that anonymous users can browse is useful for public download sites, but web authoring is equally important. In this step, you add additional authentication and authorization settings for the administrator account. To do so, follow these steps:
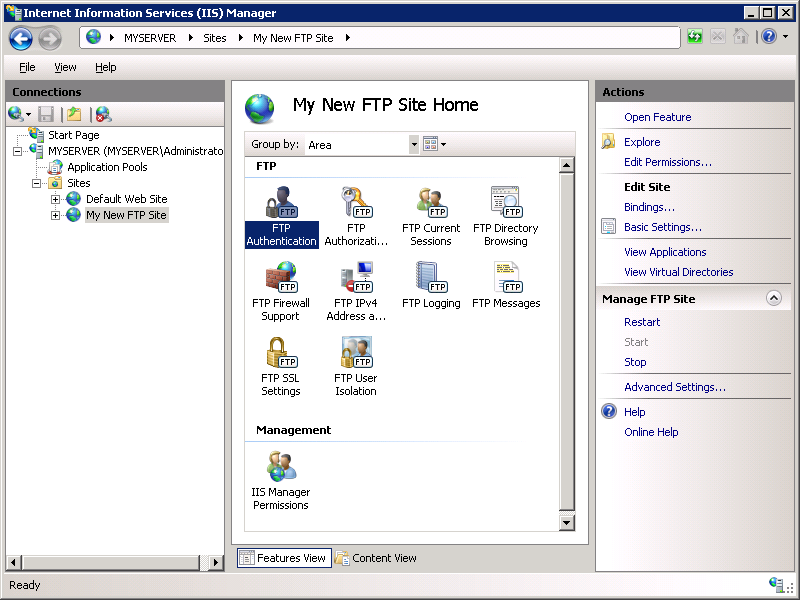
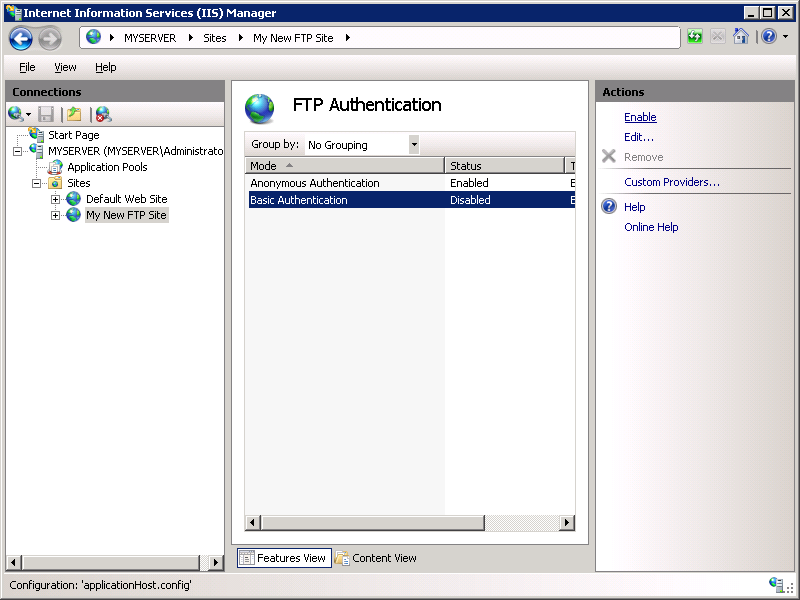
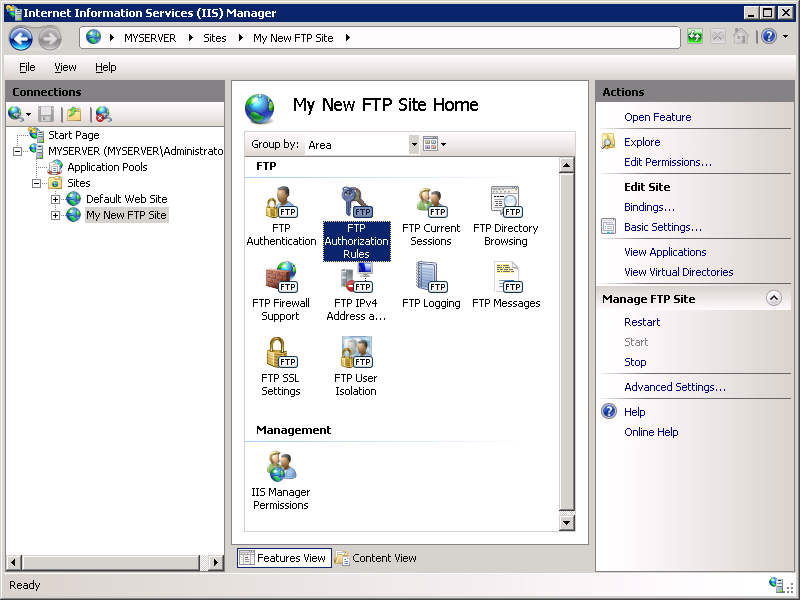
- In IIS Manager, click the node for the FTP site that you created earlier, then double-click FTP Authentication to open the FTP authentication feature page.

- When the FTP Authentication page displays, highlight Basic Authentication and then click Enable in the Actions pane.

- In IIS Manager, click the node for the FTP site to re-display the icons for all of the FTP features.
- You must add an authorization rule so that the administrator can log in. To do so, double-click the FTP Authorization Rules icon to open the FTP authorization rules feature page.

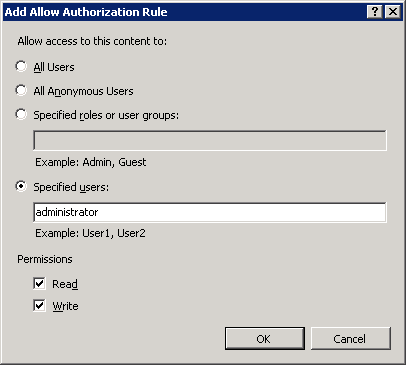
- When the FTP Authorization Rulespage is displayed, click Add Allow Rule in the Actions pane.

- When the Add Allow Authorization Rule dialog box displays:
- Select Specified users, then type “administrator” in the box.
- For Permissions, select both Read and Write.
- When you have completed these items, click OK.


Summary
To recap the items that you completed in this step:
- You added Basic authentication to the FTP site.
- You added an authorization rule that allows the administrator account both “Read” and “Write” permissions for the FTP site.
Step 3: Logging in to Your FTP Site
In Step 1, you created an FTP site that anonymous users can access, and in Step 2 you added additional security settings that allow an administrator to log in. In this step, you log in anonymously using your administrator account.
